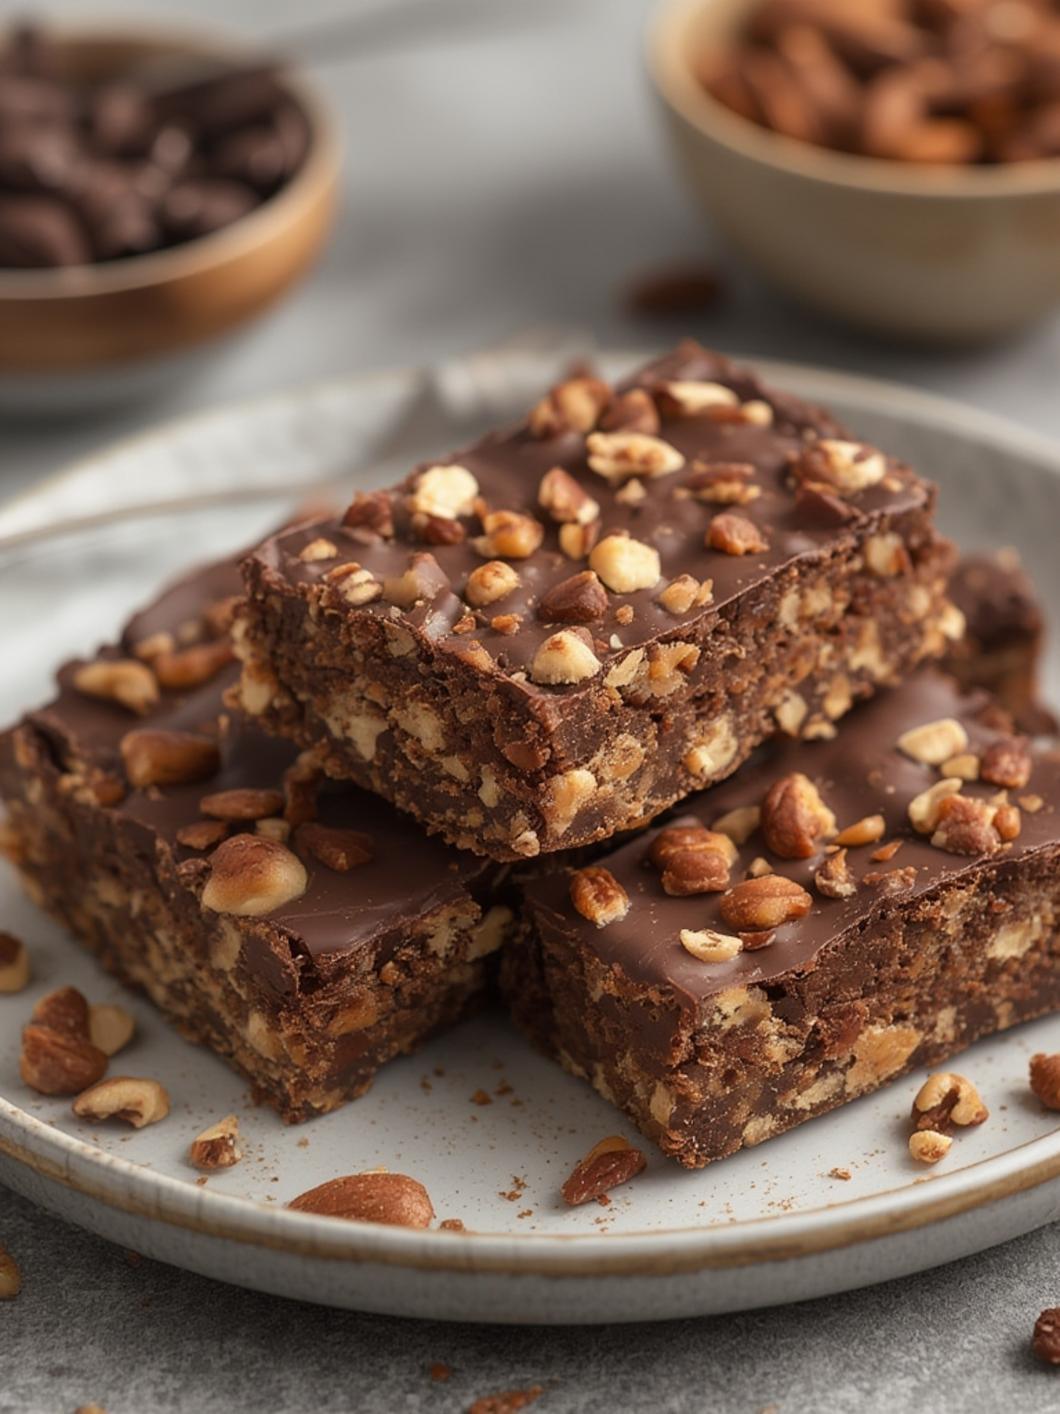
Easy No-bowl Chocolate Nut Bars in 10 Minutes or Less
Are you craving a delightful snack that’s both delicious and easy to whip up? Look no further—these No-bowl Chocolate Nut Bars are perfect for satisfying those sweet cravings in under 10 minutes! With rich chocolatey goodness combined with nutrient-dense nuts, these Chocolate Snack Bars are ideal for busy days when you need a quick energy boost.
Ingredients & Kitchen Tools
Here’s what you’ll need to get started:
– Ingredients:
– 1½ cups mixed nuts (almonds, walnuts, cashews, etc.)
– 1 cup dates, pitted and chopped
– ½ cup cocoa powder
– ¼ cup honey or maple syrup
– 1 teaspoon vanilla extract
– A pinch of salt
– Optional: ½ cup chocolate chips
– Kitchen Tools:
– A large mixing bowl (optional for mixing)
– A baking dish or pan lined with parchment paper
– A spatula or wooden spoon
– A knife for cutting bars
Prep & Cook Time
– Prep Time: 5 minutes
– Set Time: 5 minutes
– Total Time: 10 minutes

Step-by-Step Instructions
1. Combine Ingredients: In a large bowl, mix the chopped dates, cocoa powder, honey (or maple syrup), vanilla extract, and a pinch of salt. Use your spatula or wooden spoon to combine these ingredients until they form a sticky, dough-like mixture.
2. Add Nuts: Fold in the mixed nuts (and chocolate chips, if using) until evenly distributed throughout the mixture.
3. Prepare the Pan: Line your baking dish with parchment paper, leaving some overhang on the sides for easy removal.
4. Press Down: Transfer the mixture into the prepared dish. Using your fingers or a spatula, press the mixture down firmly, ensuring an even thickness.
5. Chill: Place the pan in the refrigerator for about 5 minutes, allowing the mixture to set.
6. Serve: Remove from the refrigerator and lift the mixture out using the parchment paper. Cut into bars or squares with a sharp knife.
Nutritional Benefits or Advantages
These No-bowl Chocolate Nut Bars boast a variety of health benefits! The combination of nuts provides healthy fats, protein, and fiber, while dates add natural sweetness along with essential vitamins and minerals. This makes them not only a tasty treat but also a nutritious option for an afternoon snack or a pre-workout boost.
Tips, Variations, or Substitutions
– Nuts: Feel free to use any nuts you have on hand. Peanuts, hazelnuts, or even seeds can be great substitutes.
– Sweeteners: For a lower sugar option, you can reduce the amount of honey or try using a sugar substitute.
– Add-Ins: Consider incorporating dried fruits such as cranberries or raisins for an extra chewy texture.
Common Mistakes to Avoid
– Not Pressing Firmly: Make sure to press the mixture down well. If it’s too loose, the bars may crumble when you cut them.
– Skipping the Chill: Chilling helps the bars hold their shape; avoid skipping this step for best results.
Storage and Reheating Tips
Store your No-bowl Chocolate Nut Bars in an airtight container at room temperature for up to a week or in the refrigerator for up to two weeks. If you prefer them chilled, they can be enjoyed straight from the fridge!
Conclusion
These Easy No-bowl Chocolate Nut Bars are not just a breeze to make, but they’re also a delicious and nutritious option for your snacking needs. Try making a batch today, and feel free to experiment with your favorite nuts and sweeteners. Share your creations in the comments below—I’d love to hear how they turned out!
FAQs
1. Can I freeze the Chocolate Snack Bars?
Yes! You can freeze these bars for up to three months. Just wrap them tightly in plastic wrap before freezing.
2. Are these bars vegan?
Yes, if you use maple syrup instead of honey, these bars are completely vegan-friendly.
3. How can I make these nut-free?
You can replace the nuts with seeds, such as pumpkin or sunflower seeds, for a nut-free version.
4. Can I add protein powder to this recipe?
Absolutely! Adding a scoop of your favorite protein powder can boost the nutritional content even further.